| T O P I C R E V I E W |
| Ashley |
Posted - Mar 06 2018 : 8:51:03 PM
Today, I thought I'd play around with the idea of making cinnamon rolls using the brioche recipe on pages 154–155. I followed the dough recipe just as it is written, with one minor excpetion: I omitted saving the egg white of the third egg for the egg-white wash. After the dough finished its first proof, then I started to deviate. I jotted down notes and took lots of pictures as I went.
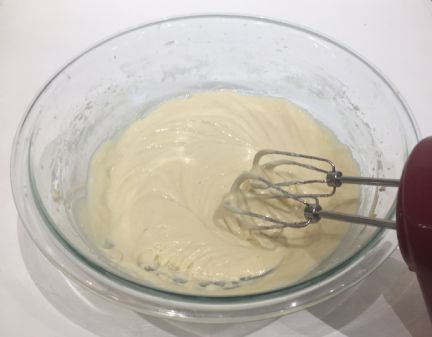
It all started with a bowl of bubbly activated batter...

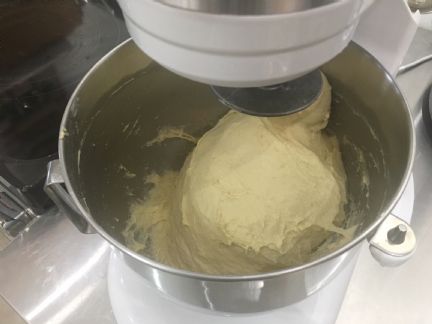
Then I mixed up the dough, and got ready to drop pieces of farm-fresh butter into the bowl.

Proofer ready

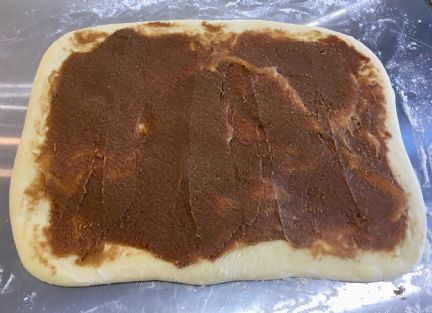
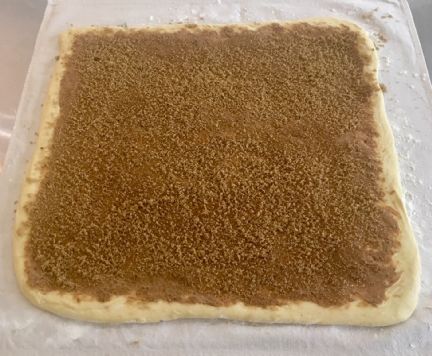
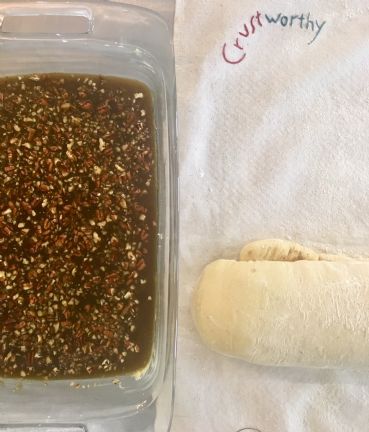
Just before the dough finished its proof, I buttered a 13†x 9†glass-baking dish. Then, in a small bowl, I mixed up 1 cup of softened butter, 1/2 cup sugar, 1/4 cup dark brown sugar, 2 t cinnamon, and 1/4 t nutmeg.
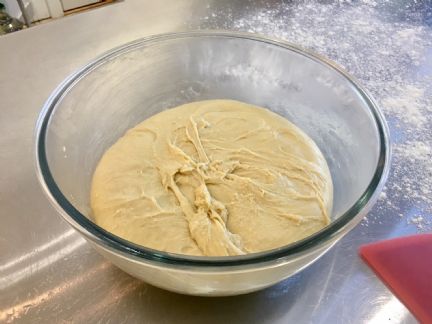
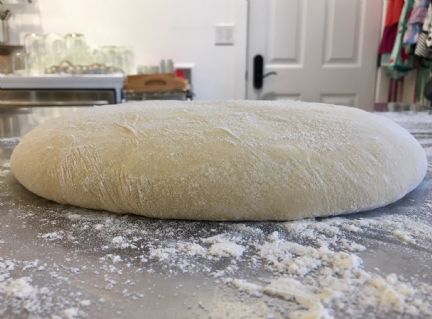
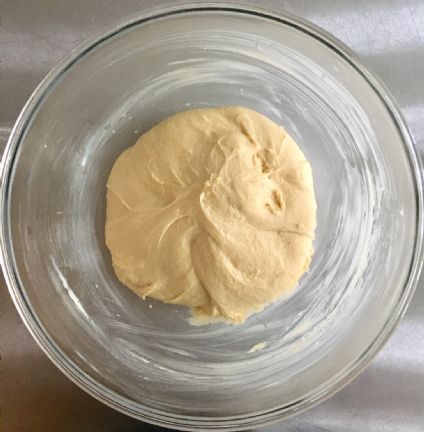
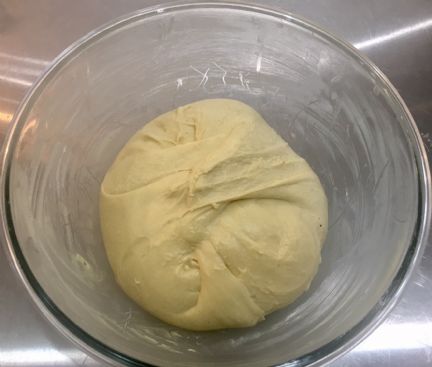
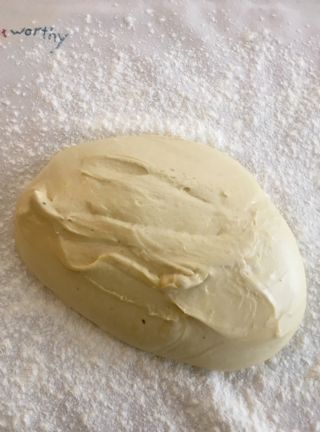
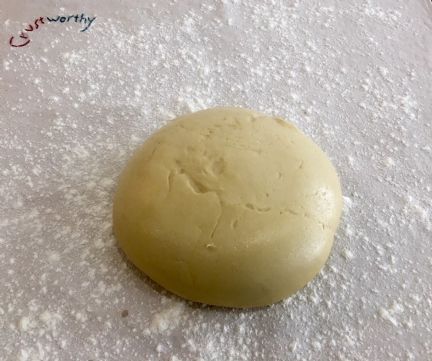
Finished with its 2 hour proof.
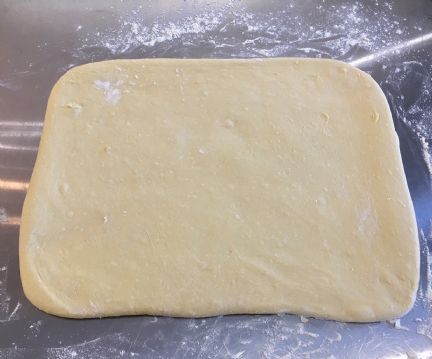
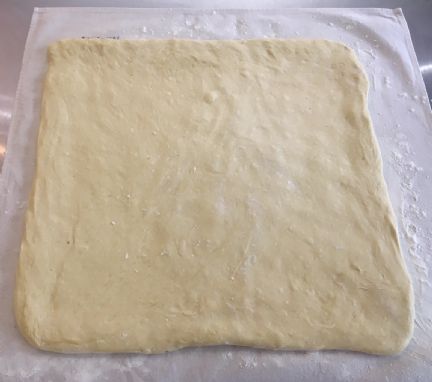
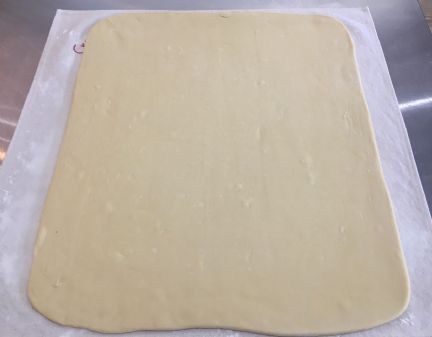
I dusted the counter with flour and got to work.
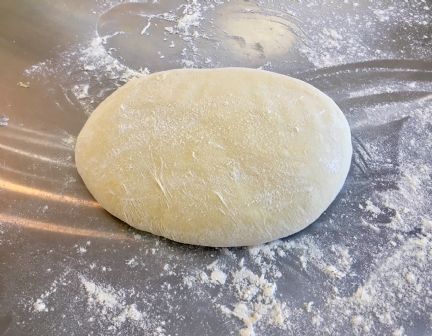
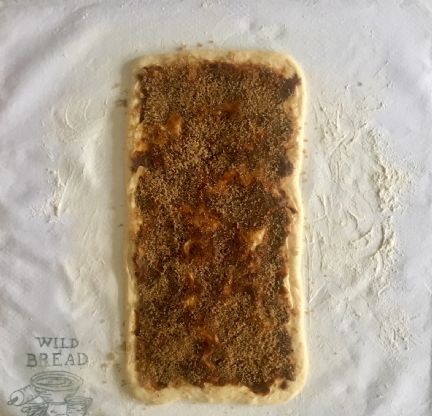
I rolled the dough out until it was a 12†x 15†rectangle.
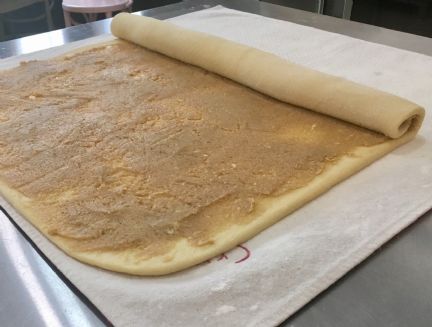
Then I spread the butter/sugar mixture over the surface, leaving roughly 3/4" space on all four sides.
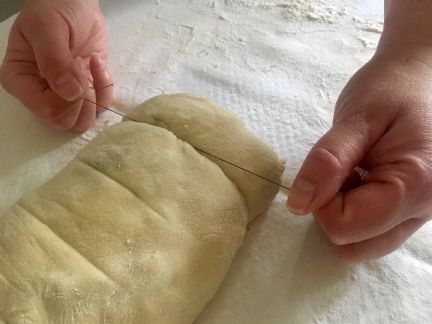
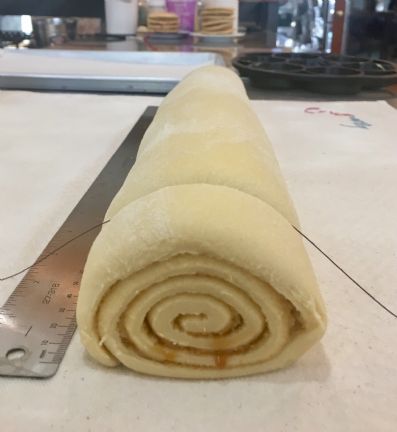
Starting from one 15†side, I rolled the dough up jelly-roll style.
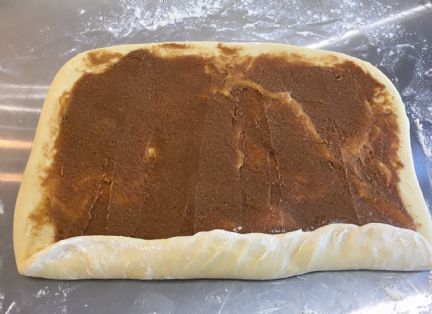
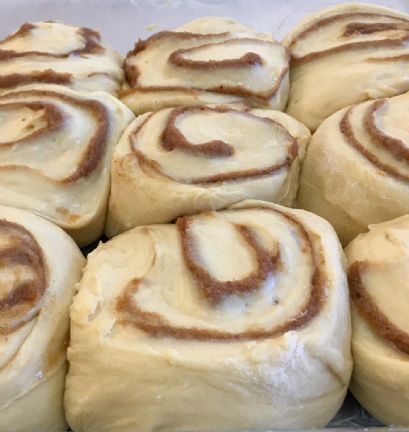
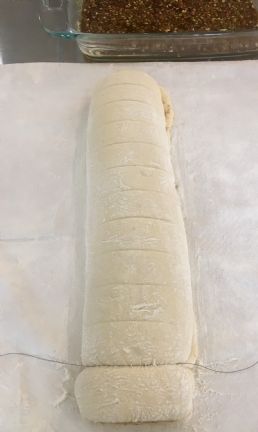
Then, using a strand of heavy-duty thread, I sliced it into 1 1/2"–2â€-thick slices.

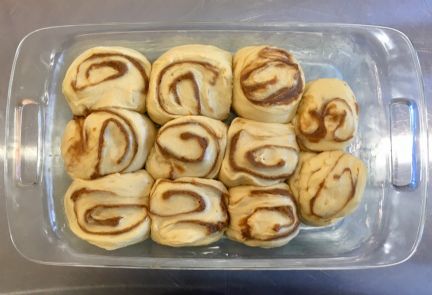
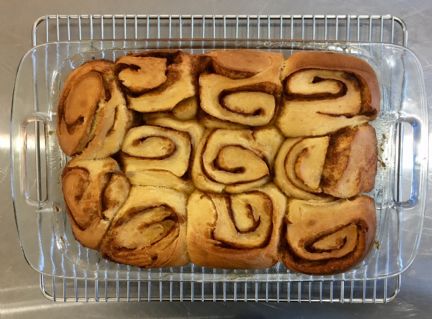
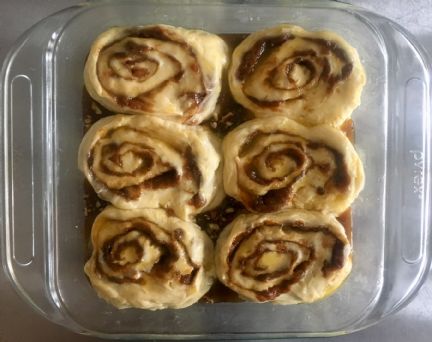
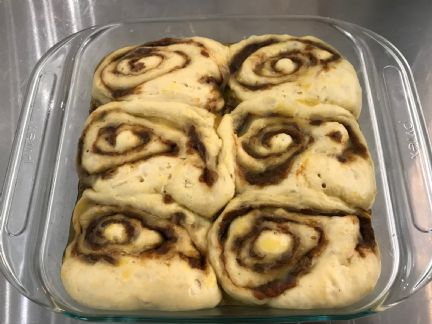
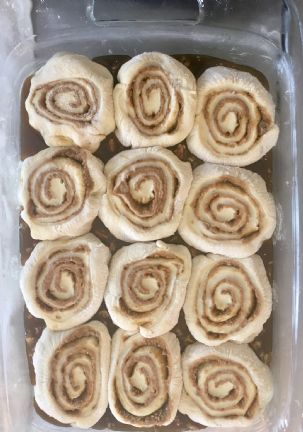
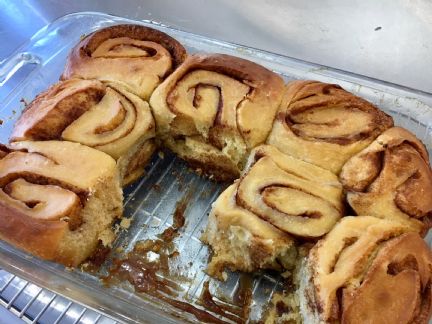
And arranged them in the prepared 13†x 9†glass-baking dish.
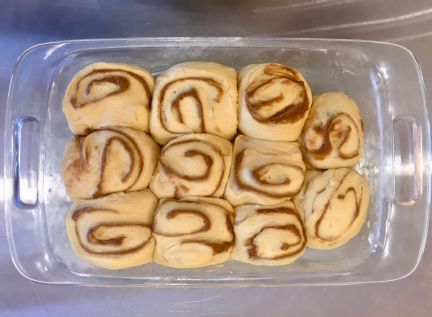
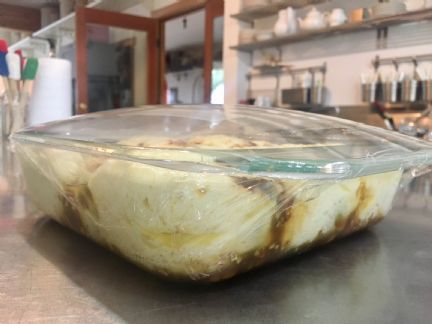
After that, I covered my baking dish with plastic wrap and let the cinnamon rolls proof for 2 hours.
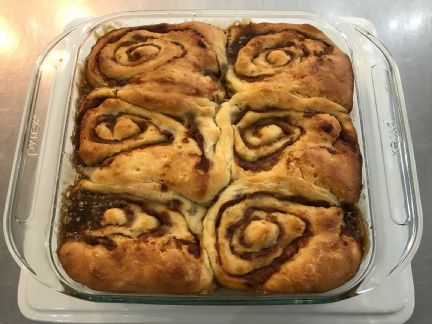
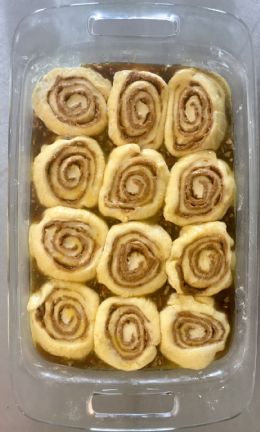
About 15 minutes before the 2 hour proof finished, I preheated the oven to 350°F and moved a rack to the center of the oven. Then I removed the plastic wrap and baked them for 30 minutes.
After 30 minutes, the rolls on the outside of the baking dish were starting to brown, so I snuck a sheet of foil over the baking dish to prevent over-browning.
While I was waiting, I whipped up a batch of cream cheese frosting. As I was mixing, the smell of the cinnamon rolls was wafting through the air.
After another 20 minutes of baking, I checked the temperature of the center cinnamon roll and it was 202°F.
…and then it was time to run and pick my girls up from school. So tomorrow I will frost these beauties and take a more gussied-up photo (and I will get to taste them  ) )
While they aren’t the most manicured cinnamon rolls, they are very soft and smell soooo good!. This works for me, because I am a sucker for soft, ooey, gooey cinnamon rolls. I am looking forward to tasting them tomorrow.
|
| 10 L A T E S T R E P L I E S (Newest First) |
| Ashley |
Posted - Apr 12 2018 : 2:15:02 PM
You're very welcome! I had a blast working on this recipe. It's also a lot of fun to have the visual reference on this thread of all of the versions that were created until we landed on a winner. |
| PaneCreatore |
Posted - Apr 12 2018 : 2:07:12 PM
Thank you ladies again for all the work and experimentation to get the perfect wild sourdough cinnamon roll. Can't wait to give it a try. |
| Ashley |
Posted - Apr 12 2018 : 11:42:44 AM
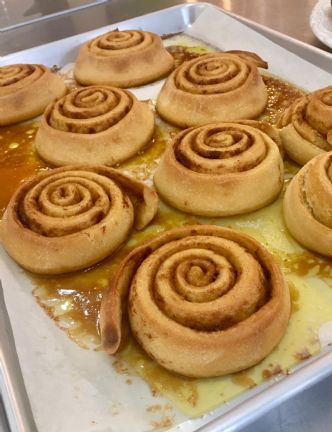
Well, we finally have a winning cinnamon roll recipe using white flour. The final change was baking the cinnamon rolls in an 8" x 8" glass-baking dish. When baked in a 13" x 9" glass-baking dish, the rolls in the center came out too soft. Because of all the thin layers of bread and the caramel sauce, it's near impossible to get an accurate temperature reading with a thermometer. For this reason, we had to rely on oven times as a guide.
When baked in a 13" x 9" dish, the cinnamon rolls on the outside were on the verge of overdone, while the cinnamon rolls on the inside were on the verge of under cooked. To top it all off, the caramel sauce hardened a little too much and resembled a shellac on the outer rolls, not the gooey sauce we were shooting for. The solution to this was to bake to rolls in a smaller pan. This worked wonderfully.
Here are a few pictures of the process.
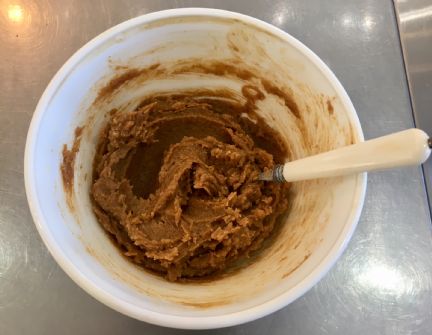
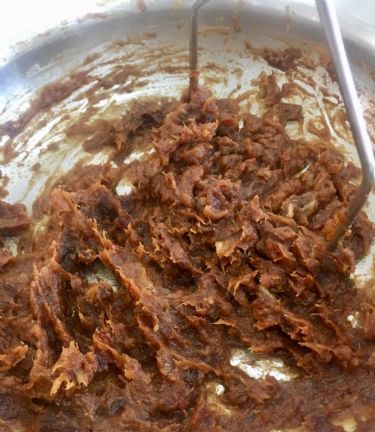
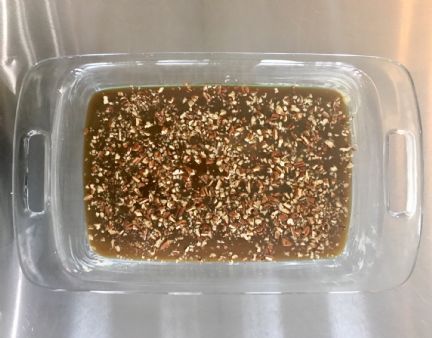
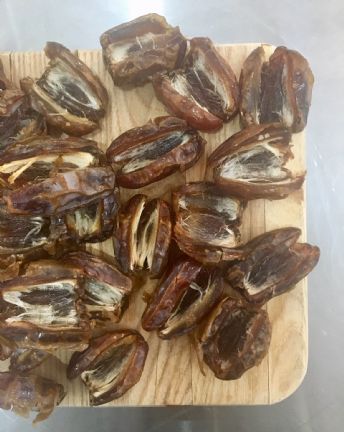
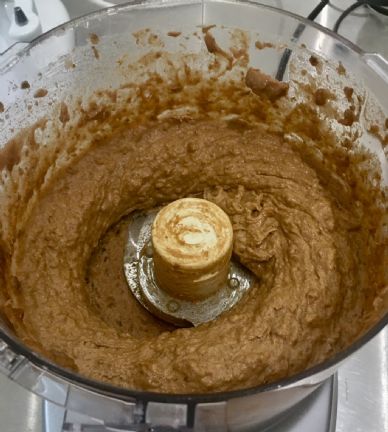
Once I got the dough all mixed together and proofing, I got to work on the date paste and caramel sauce.
First, I made the date paste. I prefer a food processor because it creates a fine paste that is easy to spread, but I wanted to try making the paste without a food processor. I added pitted and diced dates to a skillet with water, cooked them just enough to soften (less than a minute), and mashed them with a potato masher. Then I mixed in the cinnamon and nutmeg, and transferred it to a bowl.
Then I made the caramel sauce.

Once the dough proofed for 2 hours, I generously dusted a clean work-surface with flour, scooped dough onto flour, and pressed it out to an 18" x 9" rectangle (this time around, I switched it up and used our Wild Bread linen for good luck).
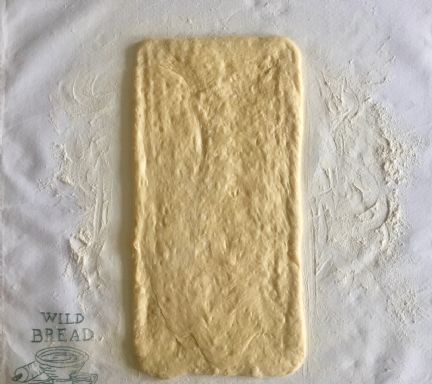
I spread the date paste over rectangle and sprinkled it with brown sugar.
Then, beginning from a 9" side, I rolled the dough up jelly-roll style. Once dough was rolled up, I used a 12" strand of thread, and cut off ends of the log (I baked these separately and gave them to my girls for an afternoon snack). Then I cut the log into 6 rolls.
After, that, I placed the rolls in my prepared 8" x 8" glass baking-dish on top of caramel and brushed tops of cinnamon rolls with melted butter, cover baking dish with plastic wrap and let rise in a warm place (70–73°F) for 3 1/2 hours.
This is a bit silly, but I love it when the plastic wrap traps gasses and expands while breads rise. Visual proof of my baking prowess, I suppose. 
Once the cinnamon rolls were ready for the oven, MaryJane took over. They baked for 25 minutes, uncovered, then 10 minutes, covered with foil.
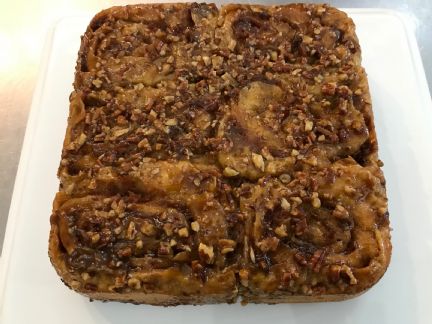
Ta-da!
.jpg?v 9770279)
Today, I'll be posting the recipe on the chatroom under the category titled Wild Bread, Book II Recipes.
|
| PaneCreatore |
Posted - Mar 26 2018 : 11:21:20 AM
Can't wait Ashley. They look so good! |
| Ashley |
Posted - Mar 26 2018 : 10:31:44 AM
MaryJane has been sharing some yummy pictures of cinnamon rolls, and I thought I'd give an update on the process. I've taken about a million pictures, and am sharing the pared down version.
The base of this recipe is our white flour refrigerator mother. The night before, I added 1/2 cup refrigerator mother to the bowl and fed it 3/4 cup flour and 1/2 cup water. MaryJane fed the mother these same amounts the next morning.
After the morning feeding, I waited a couple hours until the mother was nice and bubbly, then got to work.
I added butter, eggs, warm milk, and sugar, salt, and nutmeg to the mother.
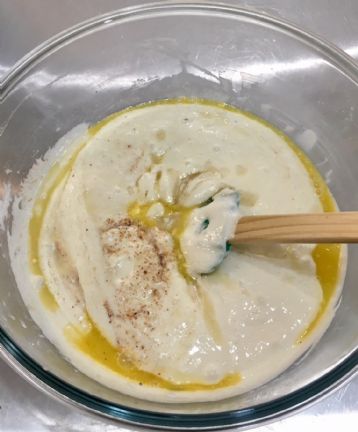
Then I poured it into the kitchen aid and added flour while mixing until the dough was sticky but manageable.
This went into a buttered bowl and into the proofer for 2 hours.
Meanwhile, I whipped up the caramel topping...
And the date paste...
This is what the dough looked like after proofing:
.jpg?v 12212320)
After that, I rolled it out…
Once it was 18” x 18”, I spread the date paste over the dough.

Then I sprinkled it with brown sugar.
And rolled the dough up.
I also made little marks into the log with my thread before cutting to ensure each roll was the same height.
Then cut them I arranged them in the glass-baking dish.
Finally, I brushed the tops with melted butter, covered them with plastic wrap, and let them proof.
MaryJane took over the baking. They proofed for 3 1/2 hours, and baked at 375° for 37 minutes. They were so good. Really everything I’ve been looking for in a cinnamon roll.
We still have a couple adjustments to make to the recipe. The thermometer doesn’t seem to be an accurate way to gauge whether the cinnamon rolls are done or not, so I need to pin down a firm baking time that ensures all of the cinnamon rolls are cooked through.
I also want to play around with a “refrigerator” cinnamon roll concept so that they can chill in the refrigerator overnight and be pulled out and baked for breakfast. I’ve enjoyed our evening batches of cinnamon rolls, but I want to work a little flexibility into the recipe.
Once these kinks and straightened out, I will type up a recipe to share, and we can move on to other flours. :)
|
| Ashley |
Posted - Mar 09 2018 : 11:56:07 AM
Yesterday was trial #2 with the cinnamon rolls, and adding more flour to the brioche dough produced a more workable dough. I was able to roll the dough out to 18" x 22", which made a cinnamon roll with a pretty spiral pattern. I added a total of 5 1/4 cups of white flour to the dough, which is 3/4 cup more than the brioche recipe calls for.
Here are a couple pictures of the dough while I rolled it out. It didn't take much effort to get from the ball of dough to the 18" x 22" rectangle.
After rolling the dough out, I spread the filling mix over the top and rolled it up from one of the 18" sides. This time, I used 1 1/2 cups softened butter, 3/4 cup sugar, 1/3 cup dark brown sugar, 1 T cinnamon, and 1/2 t nutmeg.
After the dough was rolled up, I cut it into 1 1/4"-thick slices. This gave me 14 cinnamon rolls and 2 end pieces.
For baking, I thought I’d try two methods. The first was a buttered Lodge cast-iron mini cake pan.
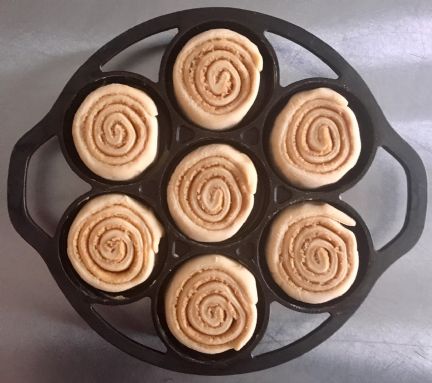
The second was a baking sheet lined with parchment paper.

After all the rolls were cut, I covered them with plastic wrap and let them proof once more for 2 hours. About 15 minutes before the final proof time was up, I preheated the oven to 350°F.
I removed the plastic wrap from the cinnamon rolls in the cast-iron pan, placed them on a baking sheet just in case sugar spilled over the edges, and popped them in the oven.
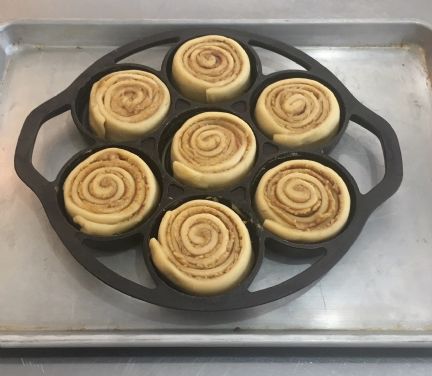
After 30 minutes, the edges of the rolls were browned, but the centers weren't quite cooked, so I covered the pan with a piece of foil to prevent the edges from burning and let them continue to bake.
15 minutes later, they were done. I'm glad I put the cast-iron pan on a baking sheet, because things got a little messy in the oven. Each roll lifted right out of the pan and they look symmetrical and oh-so-pretty.
.jpg?v 19215411)
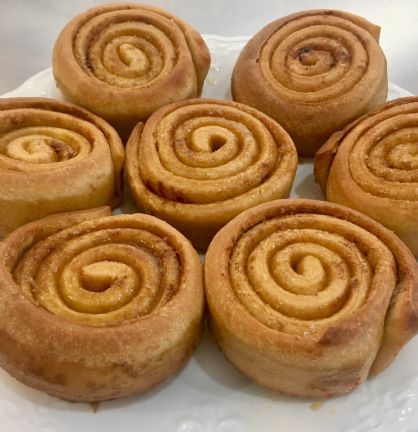
Next, I removed the plastic wrap covering the rolls on the baking sheet and popped them in the oven. The rolls took 35 minutes to bake and didn’t need to be covered with foil during baking.
I liked the baking sheet method slightly better, because they cooked faster and I only had one dish with sticky, caramelized filling to clean. The down-side to the baking sheet method is that the rolls spread out and the outer edges sloped down a little during baking, so they aren’t quite as symmetrical as the ones baked in the cast-iron pan.
|
| Ashley |
Posted - Mar 07 2018 : 10:51:51 AM
After a bit of cutting, prodding, and nibbling this morning, I have a few takeaways from yesterday's batch of cinnamon rolls.
First, the cinnamon rolls are very soft and some of the filling melted out of the layers and created a bit of caramel in the bottom of the pan.
The filling left in the cinnamon rolls had good flavor, but the layers of bread could have been a little thinner. Plus, the cinnamon rolls in the center of the pan didn't cook as well as those on the outside edges, and felt a little too bread-like.
Tomorrow I'm going to try again. This time, I'm going to roll the dough out thinner and increase the filling to help balance out the bread-to-filling ratio. I'm also going to experiment with different baking dishes, with the goal of getting each roll to cook evenly. The benefit of the glass-baking dish was that all of the cinnamon rolls fit against each other for support, but the pan also led to uneven cooking. Tomorrow, I think I will add a bit more flour to the dough, because I want the cinnamon rolls to hold their shape without needing to be pressed against each other. I will have more to say on how these changes go tomorrow, but first, I am going to do more "research" with this warm cinnamon roll…

|
| Ashley |
Posted - Mar 07 2018 : 10:44:33 AM
Thanks Rebecca and Janet! For this batch, I used our specialty white flour. Once I get the white flour recipe dialed in, I may experiment with other flours.
Janet, I don't know what it is about cinnamon rolls, but it's so easy for them to be too bread-like. I always think they need to be soft, but never doughy or cakey, and have tons of flavor. So far I am impressed with the texture of the brioche dough for cinnamon rolls, it seems to be a good choice for a jumping off point. Try, try, again is something I tell myself regularly too. :) Even when a recipe doesn't come out the way I hope, I still view it as a valuable learning experience. |
| PaneCreatore |
Posted - Mar 07 2018 : 06:44:31 AM
Beautiful cinnamon rolls Ashley! Enjoy! I experimented a couple a weeks ago with wild mother dough, the rise was nice, looked nice, but my cinnamon rolls were too dense texture. The flavor was good, but more of a bread texture than a cinnamon roll texture. What's that they say, try, try, again. I will attempt them again sometime. |
| wvdairygirl |
Posted - Mar 07 2018 : 03:52:57 AM
They look beautiful! I am anxious to know how the texture is. I never would have thought you could make cinnamon rolls from a sourdough starter! I can’t wait until my starter is mature enough for this. What grain did you use for this? |
|
|